Elara · Christmas Sweater
Knitting Adventure – My Motivation
September has been a very busy month, with lots of work behind the scenes.
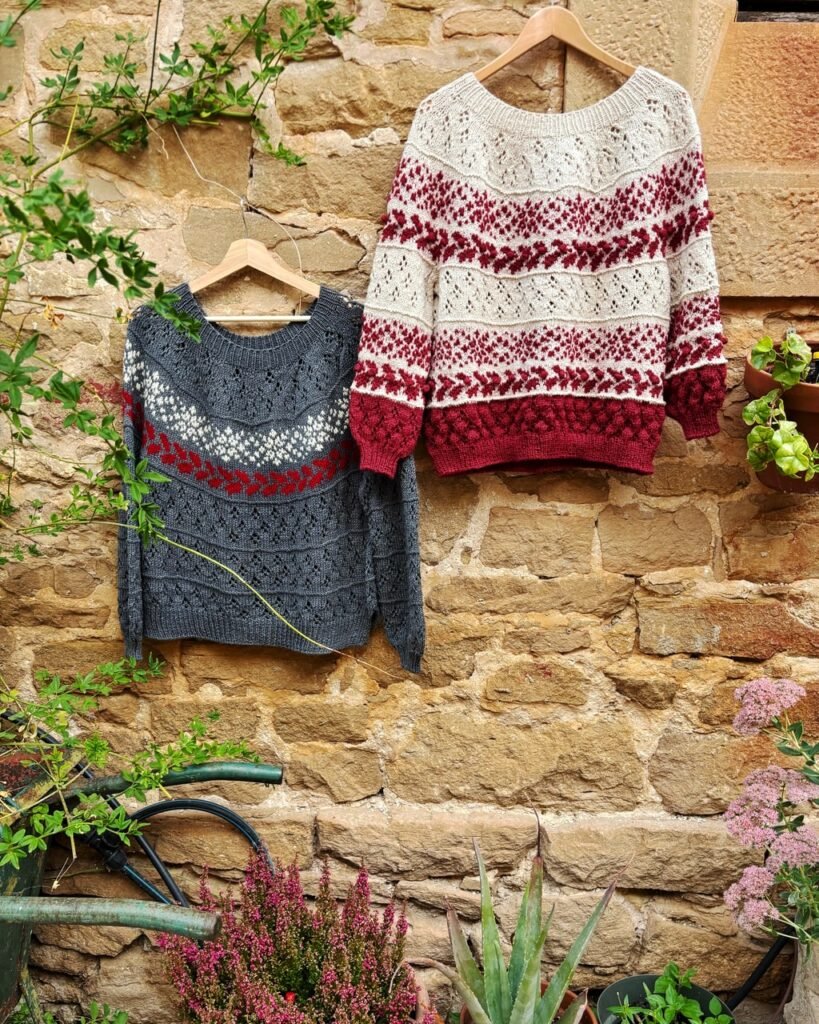
I’ve been designing, making samples and knitting two versions of Elara in parallel. I’ve also been recording the whole process to share with you over the coming weeks.
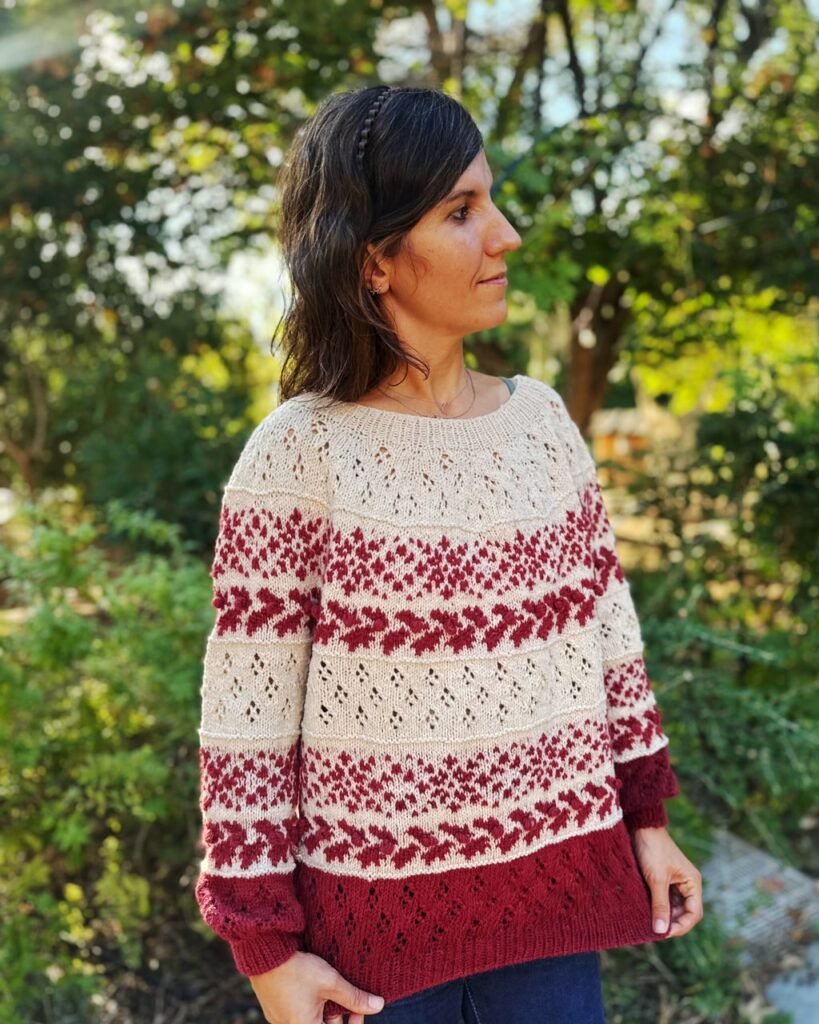
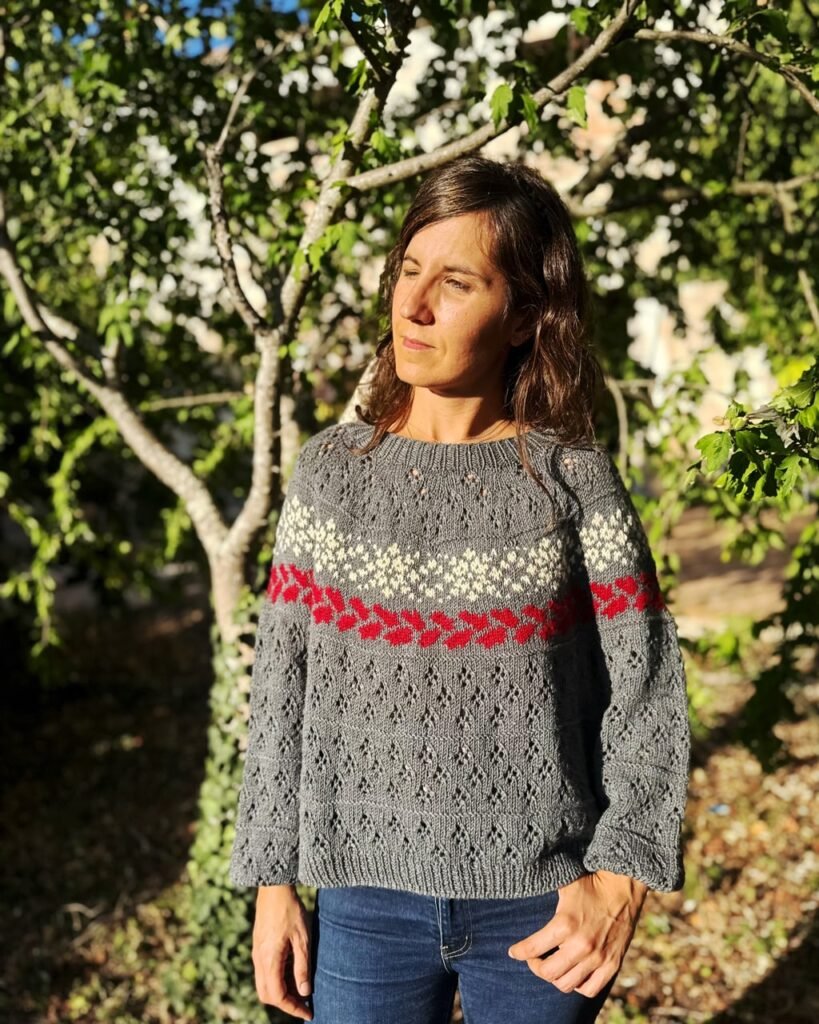
For several Christmases, I’d been thinking about knitting something special for the season, but I’ve never liked the idea of designing a garment that could only be worn for a few days, or those sweaters that have become fashionable lately and are often called “ugly” Christmas sweaters. I wanted something timeless, but with enough warmth and festive spirit to fit those special days of the year.
And that’s how Elara was born.
This time, I also wanted to do something different: not just create a pattern, but create a project that we could knit together.
Over 8 weeks, we’ll work our way through the sweater step by step, learning about lace, colorwork and design, and making small decisions along the way to adapt the garment to our own tastes.
The Knitting Adventure will be free and open to everyone, and the idea is that you can make use of any DK yarn you might already have at home.
In this post, I’ll be sharing everything that is revealed about the pattern as we go, so you can follow along without any trouble.ya desvelando del patrón para que sigáis los pasos sin problemas.
How does it work?
- KNIT: The pattern will be revealed gradually throughout the Knitting Adventure. There’s no need to sign up anywhere or finish the pattern by a specific date. This project was born out of the joy of knitting, and I want you to experience it the same way. If the next step comes around and you haven’t finished the previous one, don’t worry — everything will remain available, and you can simply look back when you’re ready.
- LEARN: Each stage will be accompanied by a step-by-step video to help you move forward with confidence. I’ll also guide you through the different ways you can customize the garment to suit your own style. You can ask me questions, and together we’ll create truly unique sweaters.
- DISCOVER: Little by little, we’ll reveal the details of the design until Elara is complete.
Instructions and Step-by-Step Videos
Materials
To choose your size, refer to the finished garment’s chest circumference. The sizes correspond to the following finished chest circumferences: Size 1 (2, 3, 4, 5) (6, 7, 8, 9): 91 (105, 112, 126, 140) (147, 161, 168, 189) cm / 36.5 (42, 44.75, 50.5, 56) (58.75, 64.5, 67.25, 75.5)” chest circumference.
I recommend choosing a size that gives you 10–15 cm / 4–6″ of positive ease.
Yarn: DK-weight yarn in approx the following amounts. The garment allows you to change the colours as you knit.
Main Color: Approx. 800 (850, 900, 925, 1050) (1100, 1175, 1250, 1300) m / 875 (930, 985, 1010, 1150) (1205, 1285, 1365, 1420) yds.
CC1 refers to the star, and CC2 refers to the leaves.
Contrast Color (CC) – yoke only (grey version):
- CC1: 85 (85, 100, 100, 115) (130, 145, 145, 155) m / 95 (95, 110, 110, 125) (140, 160, 160, 170) yds.
- CC2: 75 (75, 90, 90, 105) (115, 130, 130, 140) m / 80 (80, 100, 100, 115) (125, 140, 140, 155) yds.
- CC1+CC2 (only 1 CC): 160 (160, 190, 190, 220) (245, 275, 275, 295) m / 175 (175, 210, 210, 240) (270, 300, 300, 325) yds.
Or contrast color in the yoke and colorwork stripes throughout the body (white and red version):
- CC1: 190 (200, 220, 230, 260) (280, 305, 315, 340) m / 210 (220, 240, 250, 285) (305, 335, 345, 370) yds.
- CC2: 170 (180, 195, 205, 235) (250, 275, 285, 305) m / 185 (195, 215, 225, 255) (275, 300, 310, 335) yds.
- CC1+CC2 (only 1 CC): 360 (380, 415, 435, 495) (530, 580, 600, 645) m / 395 (415, 455, 475, 540) (580, 635, 655, 705) yds.
Needles: 4 mm / US 6 (for main work) and 3.5 mm / US 4 80 cm / 32″ circular needles (for rib).
Notions: Stitch markers, stitch holders or waste yarn.
Gauge
20 sts x 23 rnds to 4″ / 10 cm on US 6 / 4 mm needles in lacework / colourwork worked in the round, after blocking.
Abbreviations
St (s): stitch(es)
St st: Stockinette Stitch.
K: Knit
P: Purl
RS: Right side
WS: Wrong Side
Rnd: Round
CC: Contrast Color. Numbered from 1 to 2
MC: Main Color
m: Marker
PM: Place marker
SM: Slip marker
BOR: Begin of round
LHN: Left Hand needleSt st: Stockinette Stitch
Increases
yo: Yarn over
m1r: Make one right. Insert left needle, from back to front under strand of yarn that runs between next st on left needle and last st on right needle; knit this st through front loop (1 right – slanting st increased). Watch video
m1l: Make one left. Insert left needle, from front to back under strand of yarn that runs between next st on left needle and last st on right needle; knit this st through back loop (1 left – slanting st increased). Watch video
kyok: K the next st and leave it on the LHN, yo and k the same st again. (2 sts increased)
k2tog: Knit 2 sts together, 1 right – slanting decrease
ssk: Slip the next 2 sts, one by one, knitwise; insert the tip of the left needle, from the left to the right, into the fronts of those 2 sts and knit them together. 1 left -slanting decrease. Watch video
Bobble: Half Double Crochet Bobble Watch video.
1. With a crochet hook, loosely pull up a loop from next st
2. [Yarn over hook, pull up another loop from the same st] 3 times = 7 loops on hook
3. Yarn over hook, pull through all 7 loops. Chain 2
4. Bring hook to front and lift up leg of st in row below
5. Yarn over hook, pull through 2 remaining loops. Move completed bobble to RN
you could also try to do it without any hook. Watch video.
Note: To avoid holes at the side of the bobbles, you can pick up one st from the side of the bobble and ssk it together with the upper st of the bobble on the following round
Construction
This sweater is worked seamlessly in the round from the top down. The colorwork yoke is worked using only 2 colors per round. Throughout the pattern, I’ll give you different options for customizing the design. you can work the colorwork only on the yoke, or carry it throughout the entire garment and sleeves, alternating it with lace or St st after the yoke. you can also choose to make a short-sleeved version.
Next steps
Materials
Gauge & Collar
Lacework yoke
Colorwork yoke 1
Colorwork yoke 2
Body and sleeve separation
Body
Aquí todo ya será más fácil ya que solo tendremos que seguir recto
Sleeves
Finishings
Hacemos los últimos retoques y la tendremos lista par estrenar
FAQ
Esti Juango
Diseñadora detrás de ielradebuI’m Esti, the knitwear designer and teacher behind Ileradebu.
I design patterns for those who want to enjoy the process, understand what they’re knitting, and make lace their ally. I love lace knitting and design garments for both adults and children. Discover more Ileradebu patterns.
📩 Subscribe to my newsletter to receive more knitting patterns and tips.
Knitting patterns
-
AFLORA TOP & VEST
9,50€ -
AIRE TEE
9,50€ -
ALMA JACKET
9,50€ -
AMAIA TEE
9,50€ -
AMELIE
9,50€ -
ARIEL MERMAID SWEATER
9,50€